
Views: 0 Author: Site Editor Publish Time: 2026-11-20 Origin: Site


A WPC wall panel has two scales of design: the shape of one profile and the repeated surface created when several pieces cover a wall. Width connects those scales. It affects the number of panel sections across a feature, the position of visible lines and the appearance of the final piece at each end.
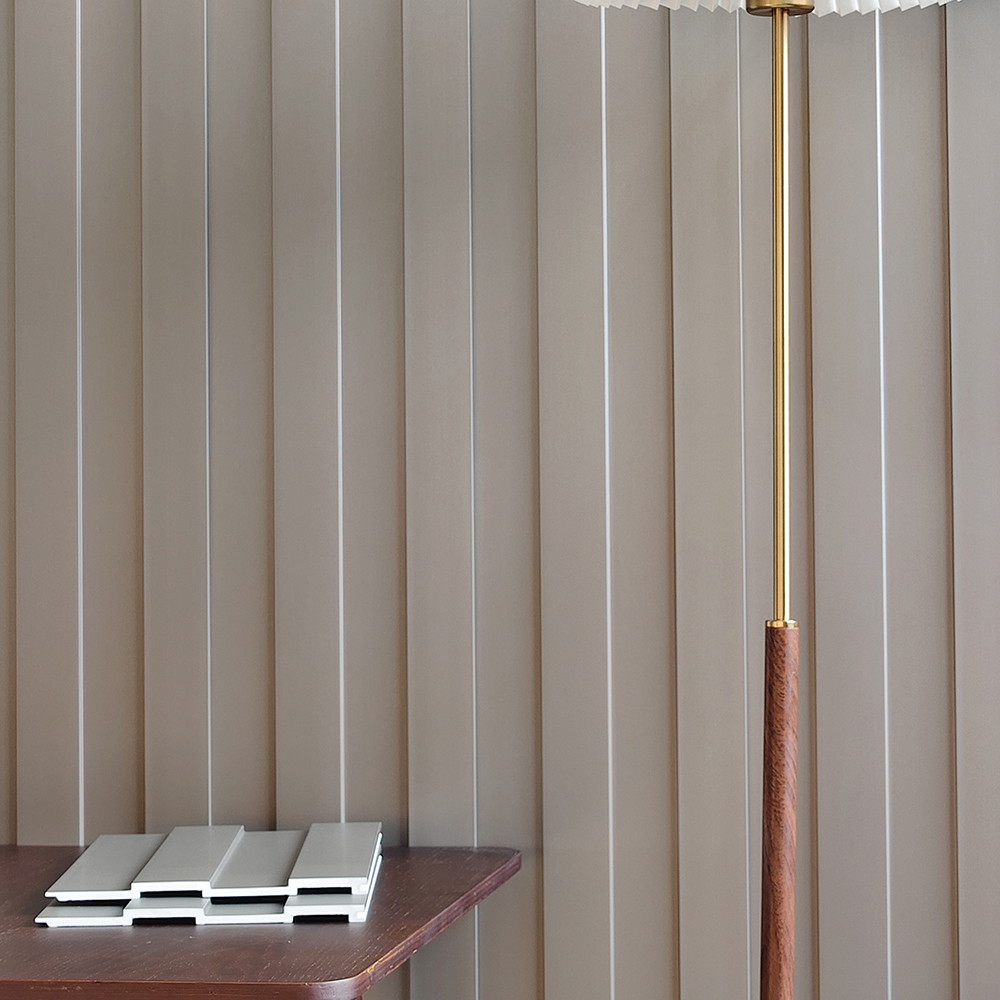
In the supplied WITOP Decor reference, a light greige finish combines broad raised faces with narrow recessed vertical channels. Matching samples on a wooden table reveal the stepped outline behind that arrangement. The image offers a clear way to consider profile shape, while the selected model’s dimensions and installation detail provide the information needed for an actual layout.
A headline panel width may describe the full width of its section. Installed coverage describes the distance that the chosen panel adds to the completed surface when used with its specified connection detail. Depending on the product, these measurements may be the same or may differ. Establish which dimension the product information is describing before using it in a wall layout.
Use the confirmed installed cover width for the repeating layout, and retain the overall dimension for identifying the physical profile. A dimensioned section drawing helps keep these meanings clear. Do not infer coverage from a photograph or assume that two panels with similar visible faces have the same edges or connection arrangement.
Overall panel width alone does not describe the decorative effect. A profile can divide its surface into broad flat faces, closely spaced ridges or a different arrangement of recesses. The proportion between the raised areas and channels determines the rhythm seen across the wall. Compare that pattern as well as the outer size of the piece.
The supplied reference gives the broad faces considerable visual space, with the narrow channels marking clear vertical intervals. Its restrained colour allows the changes in level to remain noticeable. From the front, consider the spacing of those lines; from an angle, examine how the sides of the raised sections contribute to the surface.
Define the intended boundaries of the feature before calculating coverage. A panelled area might extend across an entire wall or form a smaller background behind a cabinet or seating area. Measure that chosen area directly, including any changes in width. Keep the room dimensions and the intended panelled dimensions distinct where they are different.
Record doorways, windows and other fixed features on the same sketch. Their positions affect the pattern even when they reduce the surface area to be covered. A total area measurement alone cannot show whether a groove lands beside a frame or whether a narrow remaining strip will be prominent in the main view.
Use the confirmed cover width to mark successive panel sections on the measured elevation. For an uninterrupted width, dividing the target width by the installed cover width provides a starting point for the number of panel widths involved. The actual arrangement must also account for end cuts, openings and the selected product’s required details.
Place the internal groove pattern within those sections as well. A panel boundary and a decorative channel are not automatically the same line. Seeing both on the sketch helps explain the complete repeat. Check the arrangement from the doorway or the usual viewing position so the layout supports the way the feature will be experienced.
Starting with a complete piece at one end can leave a much narrower section at the other. A centred arrangement or another starting position creates a different result. Compare the available layouts before fixing begins, considering the visible face pattern and the importance of each end in the room.
The aim is a deliberate composition rather than symmetry in every situation. A boundary concealed by furniture may have a different visual role from one beside an open doorway. Resolve the proposed end pieces with the chosen model’s cutting and finishing guidance; the decorative sketch should work with that product detail.
Panel width is only one part of the arrangement. Compare the intended feature height with the confirmed usable panel length, and identify where any horizontal interruption would occur. Review the vertical lines alongside the top and bottom boundaries so the finished feature reads as a coherent area of the interior.
Around an opening, check the pattern above, below and beside the frame. Where switches or other fittings occur, include their positions and the relevant finished clearances in the layout. This keeps the visible profile pattern coordinated with fixed elements without assuming a particular cut-out, fixing method or mounting capacity for the decorative panel.
A physical section sample shows the raised faces, recessed channels and visible edge geometry together. A drawing adds the identified dimensions and clarifies the coverage reference. Compare the two for the selected profile, paying attention to how the decorative face relates to the full outline rather than judging the panel by its colour alone.
This link is also useful when discussing a manufactured profile. The intended outline should be identified consistently in the product reference and supporting drawing. It does not require assumptions about factory equipment or material formulation. The white cut sections in the supplied samples show their visible appearance, while the product documentation establishes the model’s construction and specifications.
Place several samples in the intended arrangement using the connection detail specified for the chosen model. Assess the spacing of the broad faces and channels across the joins, then view the combination from a normal room distance. This reveals relationships that are difficult to judge from one isolated sample or a cropped photograph.
Check the proposed layout against the actual wall sketch and surrounding furniture. Confirm the profile reference, finish and installed coverage together before finalising material quantities. A consistent set of product information supports a wall where the repeated pattern, its overall width and its place in the room have been considered together.
Panel width and profile shape work together to define an interior feature. Share your preferred face-and-groove arrangement, intended panelled area and finish reference with WITOP Decor. Contact +86 18853910723 to discuss the WPC wall panel details relevant to your selected profile and layout.
