
Views: 0 Author: Site Editor Publish Time: 2026-11-20 Origin: Site


A WPC wall panel begins as a profile design and becomes a finished decorative surface through a sequence of production stages. The shape of its grooves, the outline of its edges and the appearance of its face all relate to how the product is formed and finished. Understanding those connections makes the details of a sample easier to assess.
This article explains common extrusion-based production principles. The exact material construction, processing route and finishing method should be confirmed for the selected panel model.
Profile design establishes the panel outline before production begins. A cross-section brings together the raised face, recessed channels, adjoining edges and any other features included in the design. These elements define the repeated pattern seen on the wall. Rounded ridges, narrow grooves and broader flat areas each give the finished surface a different visual rhythm.
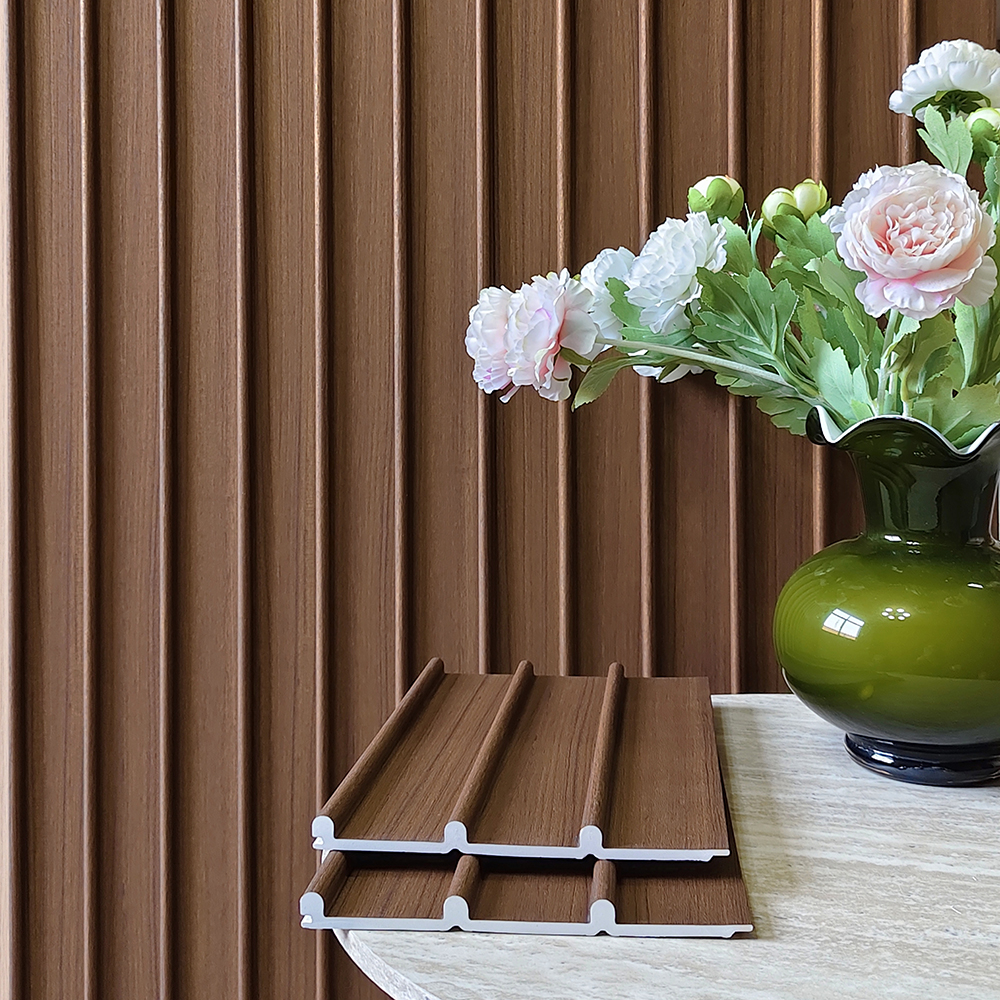
The supplied WITOP Decor image shows brown wood-look panels with rounded vertical projections and recessed areas. Two matching samples in the foreground expose that shaped section. Their white cut faces make the outline easy to see, but the colour alone does not establish the material formulation. The visible shape is the useful starting point for understanding the profile.
Material preparation supplies the compound that will be formed into the panel. WPC extrusion equipment can be arranged for direct extrusion or a two-step route. In a two-step system, initial mixing and compounding are separated from the later profile-forming stage. The prepared compound can be pelletised before being fed into the profile extrusion line.
The preparation stage connects the chosen material formulation with the intended product section. Feeding, mixing and the selected processing route belong together: they prepare material for the shape that the line is designed to produce. For a buyer, the product description and cross-section drawing help identify the construction represented by the finished sample.
During extrusion, the extruder processes and conveys material towards the die. The die tooling establishes the continuous section as material passes through it. For a fluted wall panel, this section includes the alternating raised areas and channels that create the decorative pattern along the product. The profile is formed continuously before being separated into individual lengths.
Tooling therefore connects a design drawing with a physical panel shape. The face width, ridge arrangement and edge outline are considered as parts of one section. Looking at the end of a sample shows how these features relate to one another; looking along the piece shows how the section continues over its length.
The newly formed profile continues into the downstream section of the line. Calibration helps hold its intended outline after it leaves the die, while cooling follows the needs of the selected material and profile. These stages work together with the extrusion tooling to manage the shape as the product progresses through production.
This is particularly relevant to a decorative profile with several visible ridges and recessed channels. The section needs to be considered as a complete outline, including the face, grooves and edge details. In a sample, these relationships can be viewed from the cut end, the front and along the panel rather than from one viewpoint alone.
Haul-off equipment moves the continuous profile forward through the downstream stages. Its movement is coordinated with the extrusion line so the formed section can progress towards the cutting stage. This links the profile emerging from the tooling with the lengths that will be handled as individual wall panels.
Cutting units separate the continuous product into the required panel lengths. The cut ends also provide a clear view of the section, including the shape of the visible face and adjoining edges. When reviewing a finished sample, examine the condition of these ends and compare the dimensions with the drawing for the selected product.
Decorative finishing gives the formed profile its chosen surface appearance. For film-finished panels, the surface material can combine printed wood-look designs with an embossed texture. Lamination brings the decorative material to the panel through the finishing process suited to that system. Other product routes can use different surface treatments, including printing.
The surface design and the profile shape contribute different parts of the final effect. Wood-look printing provides colour and grain detail, while the raised and recessed section changes the way light reaches the surface. In the supplied reference, the brown grain and repeated vertical shape work together across the background and the foreground samples.
A useful completed-product review follows the whole visible section. Look across the raised face, down the sides of each ridge and into the recessed channels. These areas are all part of the decorated surface. Viewing a sample from an angle can reveal details of the finish and outline that are less obvious from directly in front.
Next, follow the long lines of the piece. Examine how the ridges continue, how the edges appear and how the section relates to the agreed drawing. Straightness, the intended dimensions and a uniform profile outline are practical review points. These observations describe the product being assessed without assuming a particular tolerance or inspection result.
Finally, place several finished panels together to see the larger surface. Compare the groove rhythm, the intended joint appearance and the relationship between neighbouring decorative patterns. A small arrangement can show how an individual manufactured profile becomes a repeated interior finish, especially when viewed from the distance and lighting expected in the room.
Production gives the panel its physical outline and decorative face; the interior scheme determines how those features will be seen. A closely spaced groove pattern can create a different background from broad flat areas, while rounded projections catch light differently from sharper outlines. Assessing the actual profile helps connect the production design with the intended room effect.
A product sample, section drawing and finish reference provide complementary information. Together they support an informed choice of profile shape and surface design. The selected model’s installation guidance then connects that manufactured product with the wall preparation, compatible accessories and fixing detail required for the intended application.
From profile tooling and extrusion to calibration, cutting and decorative finishing, the production sequence helps explain what can be seen in a finished WPC wall panel. Share your preferred profile, wood-look finish and intended interior application with WITOP Decor. Contact +86 18853910723 to discuss your WPC wall panel requirements.
